| BigT |
| i AM a coop |
|

|
| Reged: 06/07/2002 |
| Posts: 1255 |
| Loc: York | |
|
Start by
taking your under tray off. I did not have one on the car. So I am
not sure how to get this off but by the looks of it there are only
four screws holding it up.
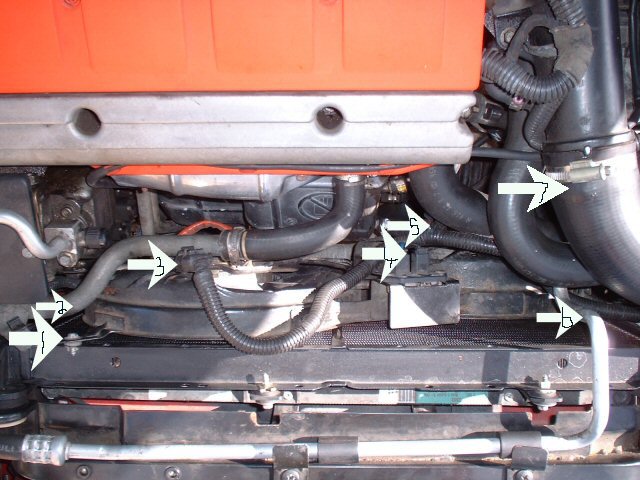
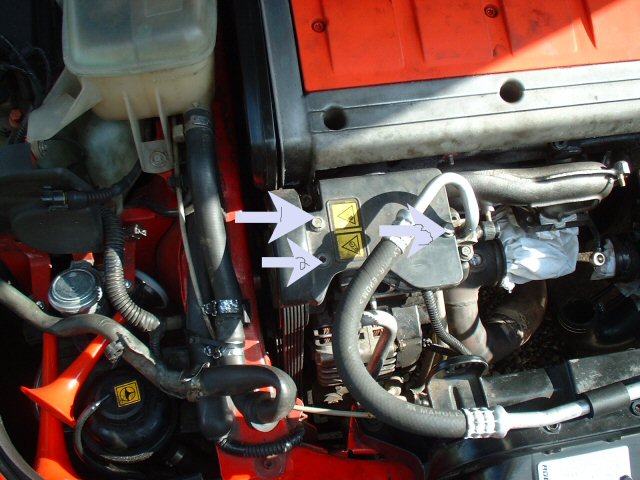
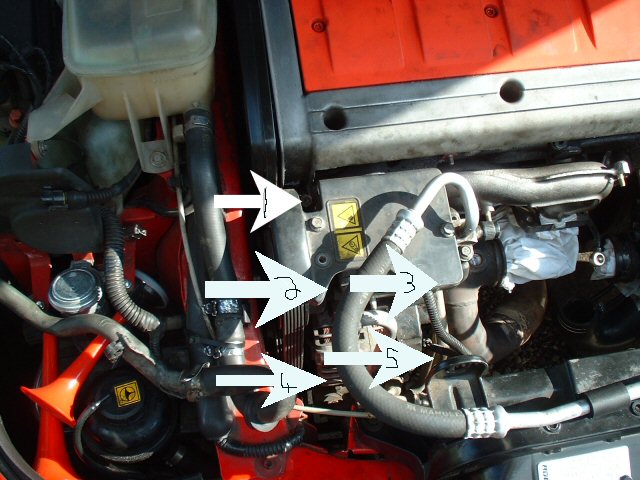
First thing to do is to remove the fan unit there are 4
screws holding this into place 1,2,6 and there is one right at the
bottom down from 6 as well. They are an 8mm bolt head on them. I
found it easier to remove the pipe at fig 7 to gain access to screw
next to it. Also unplug the wiring at 3, 4, and 5 the plug unit at 3
just pulls of the fan unit. Then remove the fans.
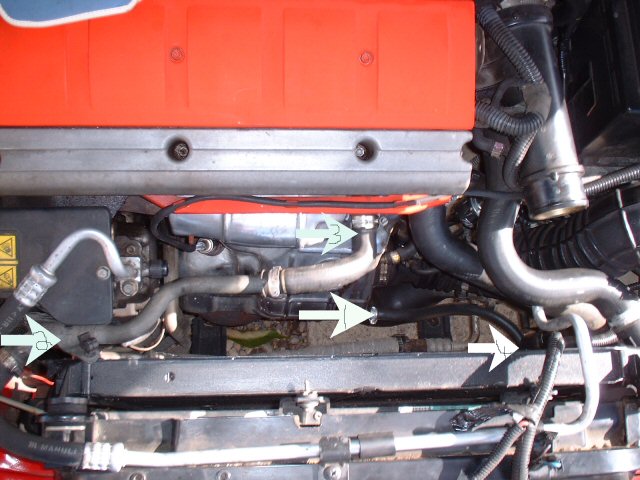
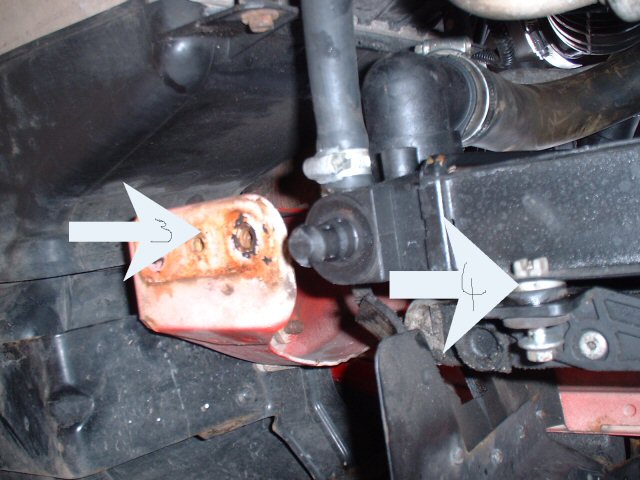
Next I jacked the car up and stood it on axle stands, Take
the top of the coolant reservoir then put a bucket under the
radiator at the front and take the pipe of from fig 1 or 4 I
disconnected it from fig 1 but I was taking my turbo of as well. Let
the coolant drain off. Then unbolt the pipe bracket from the air con
compressor fig 2. And undo the hose at fig 3. You should then be
able to pull this pipe out the way.
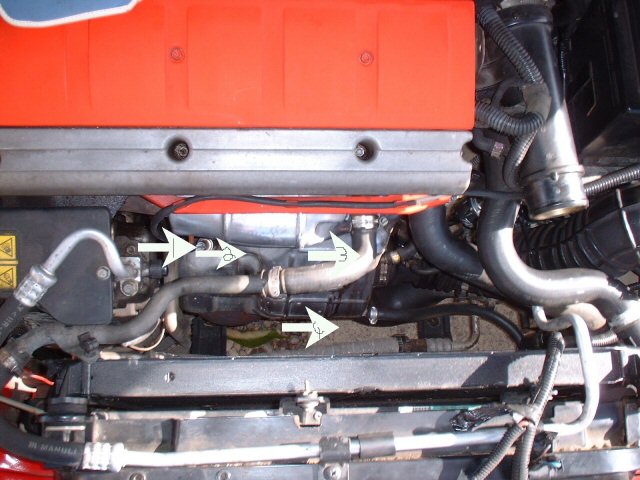
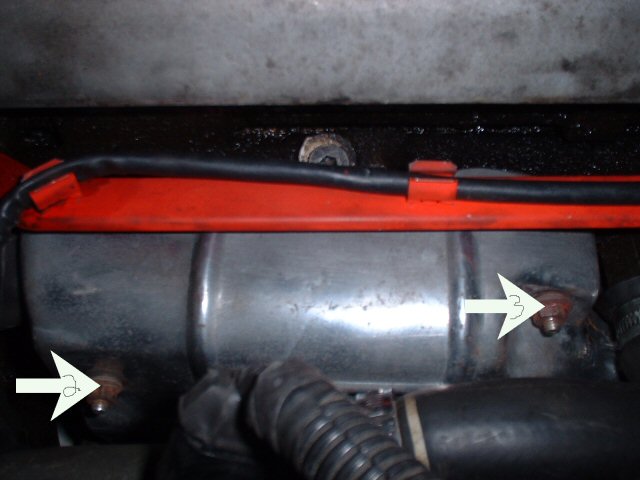
Next remove the lamda probe fig1 and put this somewhere safe
as it could get damaged easily. I used an adjustable spanner but I
think you can get a socket for this. Then remove the nuts and 1 bolt
holding the heat shield plate fig 2,3 and there is 1 bolt right down
at the bottom fig 4.
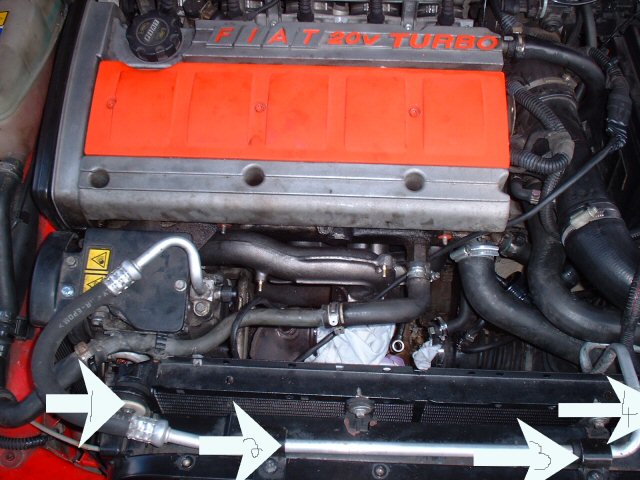
Now its time to drop down or remove the radiator. There is
an air con condenser unit at the front of the rad. This will need
supporting. Undo the two screws fig 1,2 these are the same as the
fans 8mm. then tie some string through the holes on the air con
condenser unit and tie it to the front somewhere. And remove the
rest of the pipes from the rad. You will probable have to snap these
off as they will be the fiat clips. You will need new jubilee clips
to refit them. Remove the 2 radiator securing screws 1,4 and the air
con pipe securing screws 2,3
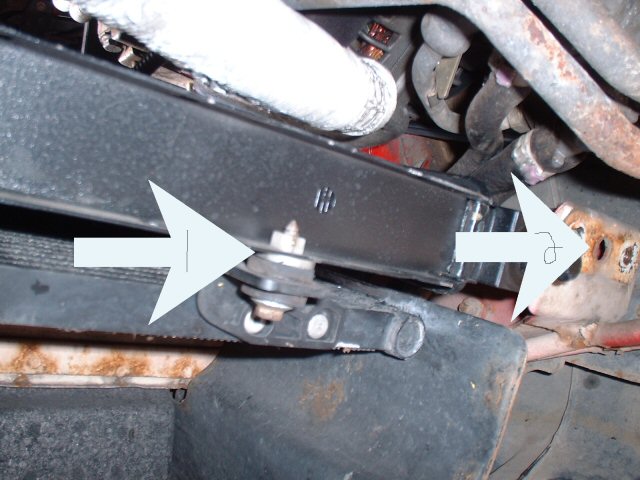
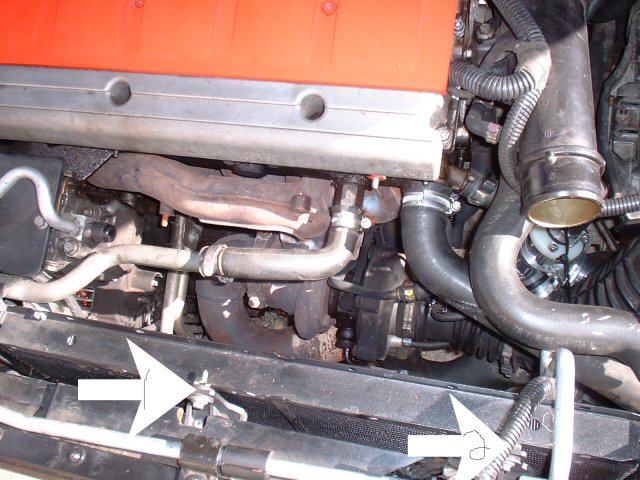
You will now need to go under the car. There is another two
screws on the bottom of the rad holding the air con condenser to it
1,4 remove these and the air con part should be loose. Now remove
the bar supporting the radiator 3,2 there is a bar there but I
forgot to take a pic before. Doh! Also disconnect the air con pipe
from the supporting bar. Lower the rad down or take it out
completely.
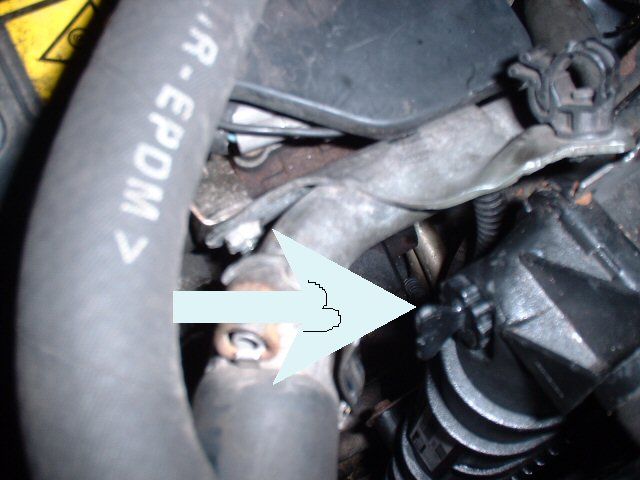
Remove the 3 bolts holding the cover plate to the air con
pump 1,2,3 . Next you need to release the tensioner down the side of
the engine.
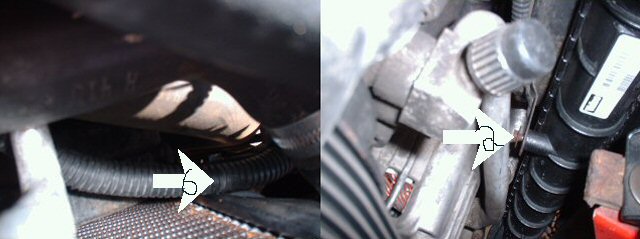
You need to make a tool to get into this. I used an 8MM alan
key. Cut the end down the bit with the bend with an angle grinder to
2Cms and extend the shaft with a bit of tube to about
50Cms

Insert this into the tensoner in the other pic and undo. Do
not undo it to much just slacken it off.
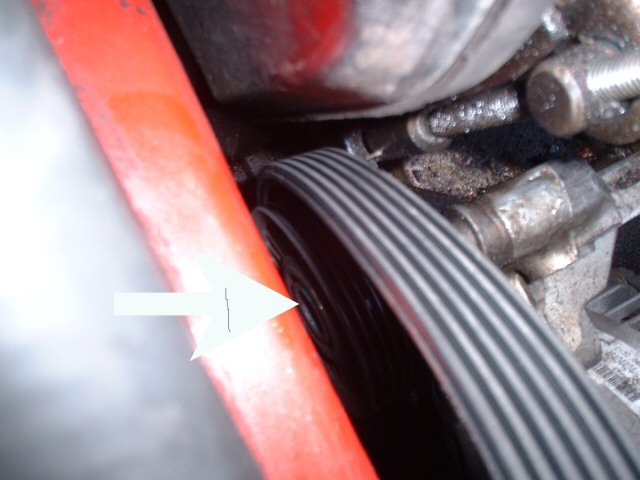
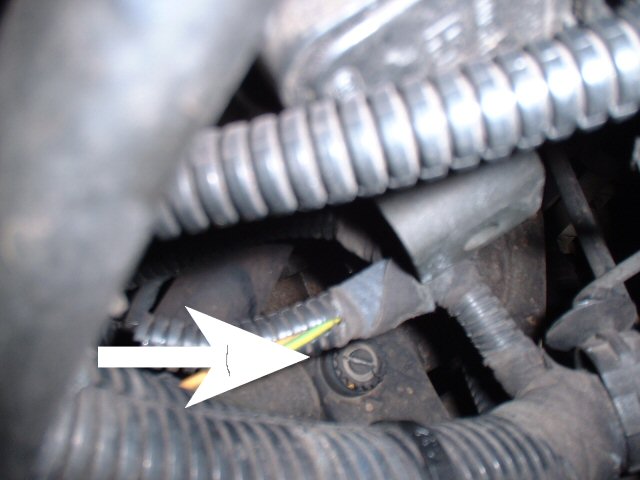
Next slacken of the micrometer screw in the air con pump fig
1. This should now release the belt and you can pull the belt to one
side. There are 4 bolts holding the air con compressor on fig
2,3,4,5 undo and remove these and the air con compressor should come
away from the securing bracket.
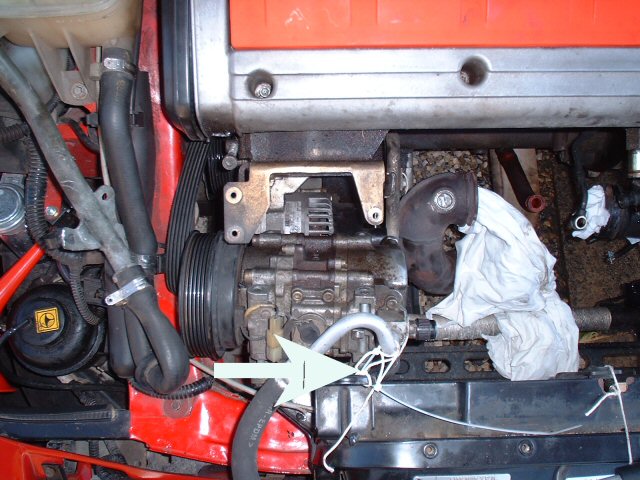
Next I used a tie wrap to secure the air con compressor to
the radiator mounting fig 1. You now have enough room to get to the
last bolts on the manifold.
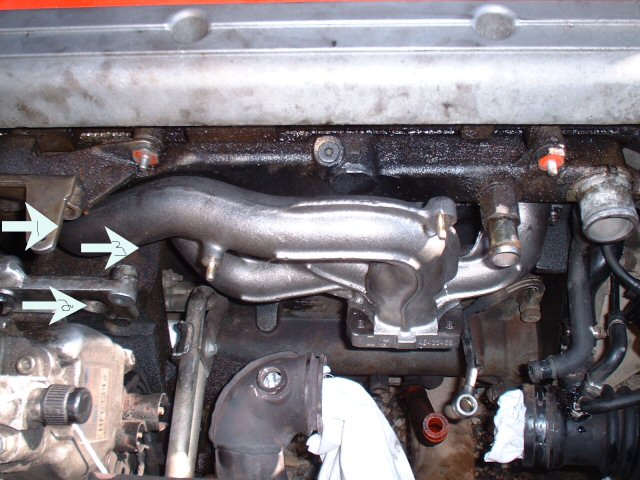
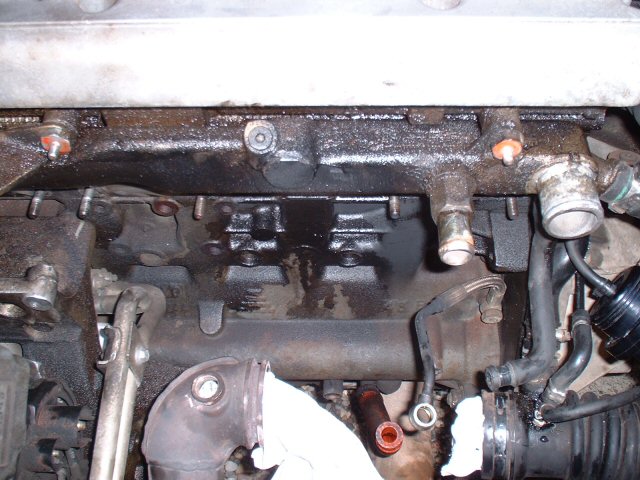
The last bolts are positioned at about fig 1,2,3 you can get
a socket with an extension bar through fig 2 to get to the bottom
bolt. Then undo all the rest. They are a 12MM socket. Mine where
quite easy to get off.
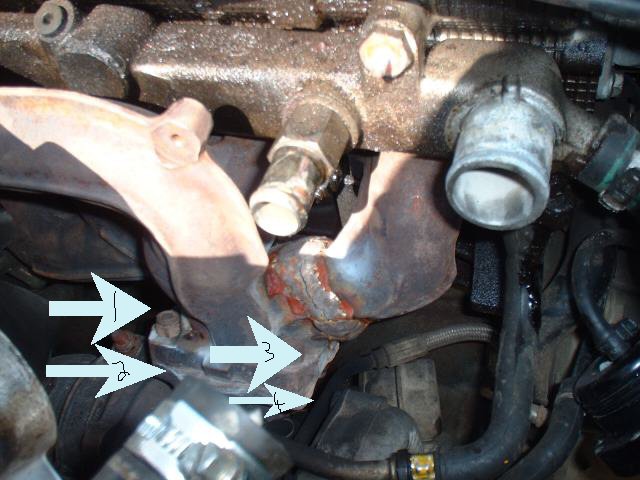
Now undo the bolts to the turbo fig 1,2,3,4 and you manifold
should lift out. The front two are not that bad to get to but the
back are a real nightmare. I used the ring end of a spanner upside
down.
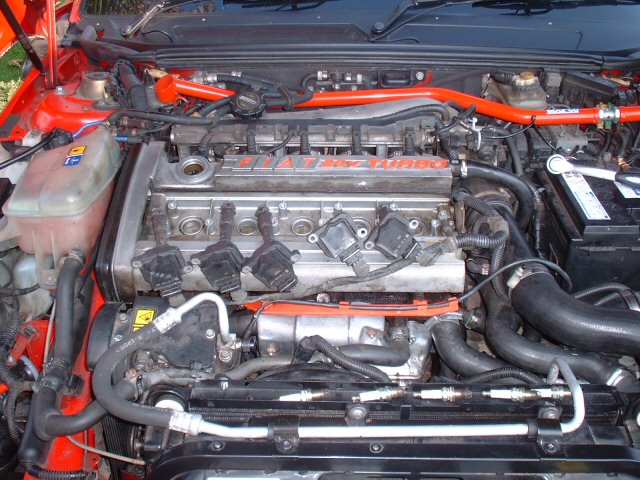
Manifold is out time to put the new one back in. It takes a
bit of jiggling to get it back in.
Sorry I dont have many
more photos after this as I got carried away working and forgot to
take some more. As they say in the Haynes manual refitting is the
reverse of removal. Just a few little bits. After refitting the belt
to the aircon compressor tighten the micrometer screw until there is
about 1cm of play on the belt and then retighten the tensioner with
the made-up tool. Make sure there is no grit or bits stuck in the
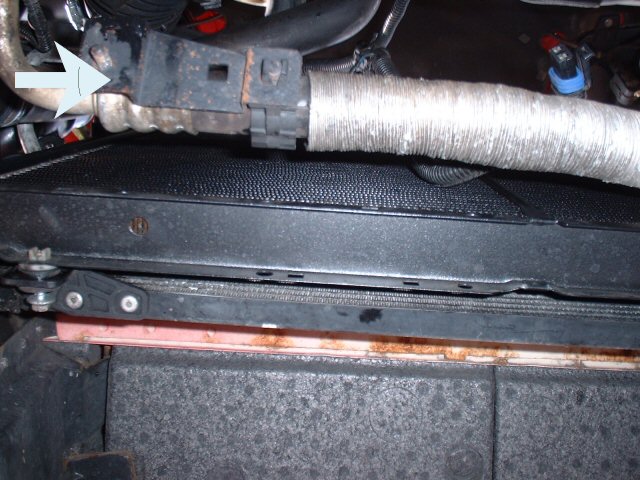
belt as well. When refilling with coolant there is 3 bleed valves
this has been mentioned before. I have some pics
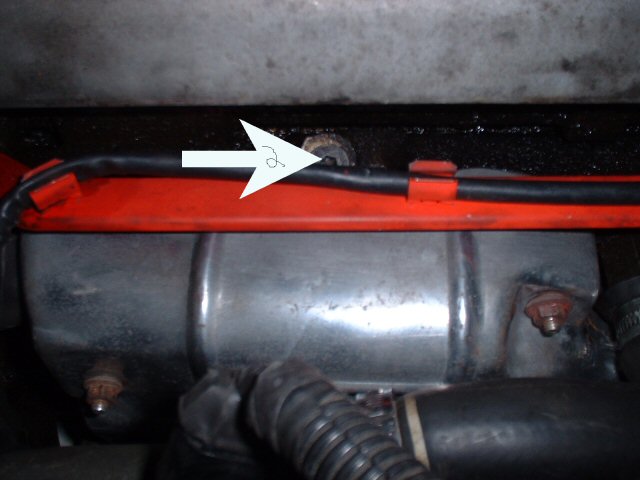
The far one is located just to the side of the batter tray.
One at the side of the rad. And the other is in the middle of the
engine just above the heat shield plate Open all these up after
refilling until you get a trickle of coolant coming
through.
Next take out the plugs or just disconnect the coil packs
and prime the turbo before restarting. Hold the ignition on with no
plugs in until the light on the oil pressure goes out and the
pressure goes up to full.
Here are some torque figs I got out
the manual
Coolant 7.5ltr 50/50MIX
Air con bolts
50NM
Spark Plugs 27NM
Turbo Flange 59NM
Manifold to
cylinder head nut 25NM
Hope this makes some sense. This
job took me a couple of days but I was changing the turbo as well
and I have never done anything like this before. Many thanks to Taz.
Beast and everybody who has helped
me.
--------------------


1/4 Mile - 14.252@100.13
Post Extras:     |
| Gurmon |
| forum = second job |
|

|
| Reged: 26/07/2002 |
| Posts: 808 |
| Loc: Heathrow | |
|
Fantastic
guide, Very Very Well done, I`m sure it going to help many members.


--------------------
20VT LE #0062 Met Black. LE No2
FCCUK Member No 246
Mods : Filter, Exhaust, Dumpvalve, Blitz
Boost Controller, Chip, Drilled & Grooved Discs, Fast Road Pads.
Now with onboard ACR Reader 
Post Extras: |
| fastedd |
| forum = second job |
|

|
| Reged: 14/12/2001 |
| Posts: 753 |
| Loc: Lowestoft ex Aberdeen
| |
|
I was
wondering how to fit the hybrid (when i get it  ) )
A
very good guide, very helpful, thankyou!
Ed
Post Extras: |
| Taz |
| i AM a coop |
|
|
| Reged: 16/10/2000 |
| Posts: 1349 |
| Loc: Kent coast......bootleggers paradise ! ,
maybe Romford at times, when I'm up to no good !
| |
|
bloody
hell..........well done BigT..........that is an excellent
guide....you done well there mate.
I am again this weekend
taking my front struts off, so I may do a "how to" for chaps /
chapesses who want to lower the front of their
coops.....
glad you got there in the end mate......a lot of
cuts n' bruises later...but just think....you've saved yourself
about £350 !
cheers
Taz
--------------------
20VT
LE.....
dunno what else to put in ere ! 
Post Extras: |
| craig |
| reaping the fruits |
|

|
| Reged: 13/05/2002 |
| Posts: 419 |
| Loc: Staffordshire | |
|
A superb guide
BigT. Well done. If only we had a "How to.." section on the forum
this would be ideal for inclusion.
Post
Extras: |


 Flat
Flat  Threaded